
Food photography behind the scenes | How to shoot pasta bakes
Below is a behind the scenes look, tutorial, photography tips and how-to on how I took the main image for my grilled cheesy gnocchi with leeks and mustard recipe. Below you will find out exactly how I did it from my setup, lighting and editing. My full session on photographing food. A food photography course if you will.

Grilled gnocchi pasta food photography photo.
If you are reading this, you have probably come here either from my Grilled cheesy gnocchi with leeks and mustard healthy 15 minute dinner recipe. In which case, I'm glad you’re enjoying the blog! How was the gnocchi recipe? Did you enjoy it? Delicious right. I did tell you it would be.
That, or you’ve just happened to come across this post throughout the internet world. In which case, Welcome to my blog. Today we will discuss food photography tips and how to achieve the pasta bake photo I took for my grilled gnocchi recipe. You can check that gnocchi recipe out here.


Follow along
The best way to learn food photography is to practice. Food photography tips are great, but practise will help you input them tips into photographing food.
If you make the same dish i did, it will look pretty much the same. Rather than just reading this post and hopefully picking up a few food photography tips and techniques to implement on your next food photography session. You can follow along with the props and space you have to recreate similar photos with your own flair and style.
So before you continue, head over to my Grilled cheesy gnocchi with leeks and mustard recipe. It's easy to make with easy to get ingredients, then return here to follow along and take you food shots of your dish. A full pasta food photography follow along.
DSLR or Smartphone
I take the majority of my food photos on my Nikon Camera. But you can follow along just as easy with a Smartphone. Iphones, Androids, Samsung, whatever phone you have. Nowhere days, Smartphones have pretty high quality cameras. You can take professional food photos easily on any newer smartphone.
However, you are always going to have more control with a DSLR camera. Smartphones rely a lot on clever auto settings to help you take the perfect food shots. Whilst professional cameras have a larger array of options for manually shooting. Meaning more control over the shots you have.
Whichever you’re using is okay, just practise, play around and hone your skills.
If you want to learn how to take better food photography with your smartphone. Check out this great resource below.

Pasta bake Food photoshoot results. Before and after.
Camera settings
As mentioned above. With a professional camera you have a lot more control over your settings and how your end food shots will look then you do with a smartphone. If you are using a smartphone. A lot of this section will be irrelevant to you. The next 3 paragraphs will cover my camera settings, so if you’re using a smartphone. Skip 3 paragraphs ahead.
DSLR Camera Settings
An important thing to note is even if i gave you the settings i used on my camera (Which i will), you might not get the same food shots i do. As it depends a lot on lighting. Unless you’re using the exact same photography lighting I am, placed exactly the same. Which is highly unlikely. You are probably going to have to tinker around with your settings a little.
The setting i used:
Shutterspeed 1/80
Aperture F/4
IOS 400
With this being a shot from above on a flat layout. I didn’t want everything to look blurry except for my focus point. It wouldn't make sense, the depth of field would be confusing. So using a higher aperture allows for more of a larger focus point.
The camera was attached to my tripod. Meaning once in place i didn’t have to touch or move the camera. I used a remote clicker to assure I wouldn't touch the camera. Doing this meant I could keep my shutter speed relatively low without having blurry images and still have a crisp finish.
As always, the IOS was a setting I played around with last.
Smartphone settings.

Food photography - smartphone camera settings.
Just because you’re using a smartphone, doesn’t mean you have no settings to adjust. Once you have your set up, your lighting and you angle figured out. Take a few tester food shots.
With each shot play around with your settings, lifting and dropping the brightness, playing around with contrast. Different phones will allow you to use different settings. If you’re unfamiliar with your phone settings, take a 5 minute break here, play around on your camera. Maybe do a google search to find out what camera settings you're able to change on your phone and how to do it.
Now you’re familiar with your phone camera settings, after you’re set up is ready, you can play around to see what works best for you.
Remember, if you’re following along with this, your photo doesn't have to look exactly like mine to be successful. It’s all about finding your own photography style. Something with your character in it. Your own ideas. Camera settings will go a long way to creating your personal photography style. Just as old instagram influencers used to use the same instagram filter to create a personal style.
Photography set up
Now for the set up. What you will see below, is that my set ups often look messy. That’s the beauty of it. It’s something I really enjoy about food and drink photography. The fact that you can have these photos that look like they’ve been taken is pristine conditions. Yet, behind the scenes, they have really been taken on my dining room floor. Or tropical cocktails that look like they've been taken on a Caribbean beach and not the kitchen of my rainy Manchester apartment.

Grilled gnocchi food photography set up image
So let’s break down this set up. Firstly, is the frame and composition. The dish we are photographing is bright and vibrant, so shooting that on a dark backdrop creates contrast.
The backdrop we will talk in more detail about below. For now, let's concentrate more on the angle and composition of the image.
Angle
Pasta dishes and baked dishes tend to look better from that top, birds eye view angle. The reason is simple. All the detail tends to be on top. When photographing foods such as burgers, or cakes, a lot of the detail is front on. So a front angle is more suited.
This dish has all the details on the top. Shooting from the front would show nothing but a white dish. Maybe with some pasta poking through the top. But the majority of the detail will be lost. So a top view is preferable.
Tip for achieving the perfect top angle.
Without the proper equipment for taking these kinds of photos, it can tend to be a lot harder than you might expect. If you’re off by even a tiny bit then it shows in the image. Having your camera or smartphone perfectly straight is important. Below is my DIY tip to making sure you get your angle perfect:
Use a glass or mug. Seeing if your angle is straight is difficult. For the most part it’s something we will no doubt pick up on when editing a photo. Which is frustrating to say the least. A glass or mug is an easy way to show if you’re too far forward or back. If you’re using a mug, you should see nothing but the perfectly round rim of the mug and the bottom circle of the mug.
If you can see more of the inside, side parts of the mug, it means you’re not straight.

Top angle tip photo.
Composition
Composition is basically how everything in the frame is placed. In this photo I utilize both negative space, and props to make the photo pop with a layer of interest. Having your photo framed in a way where it’s just a dish or piece of food in the middle of the frame with nothing else can be, well, boring.
Having my food off-centre adds some life to the photo. The negative space helps stop the image from looking over crowded and the props, which in this case is the yellow towel, scattered leek and chopping board, adds some interest in the photo. It tells a “home-baked” sort of story.
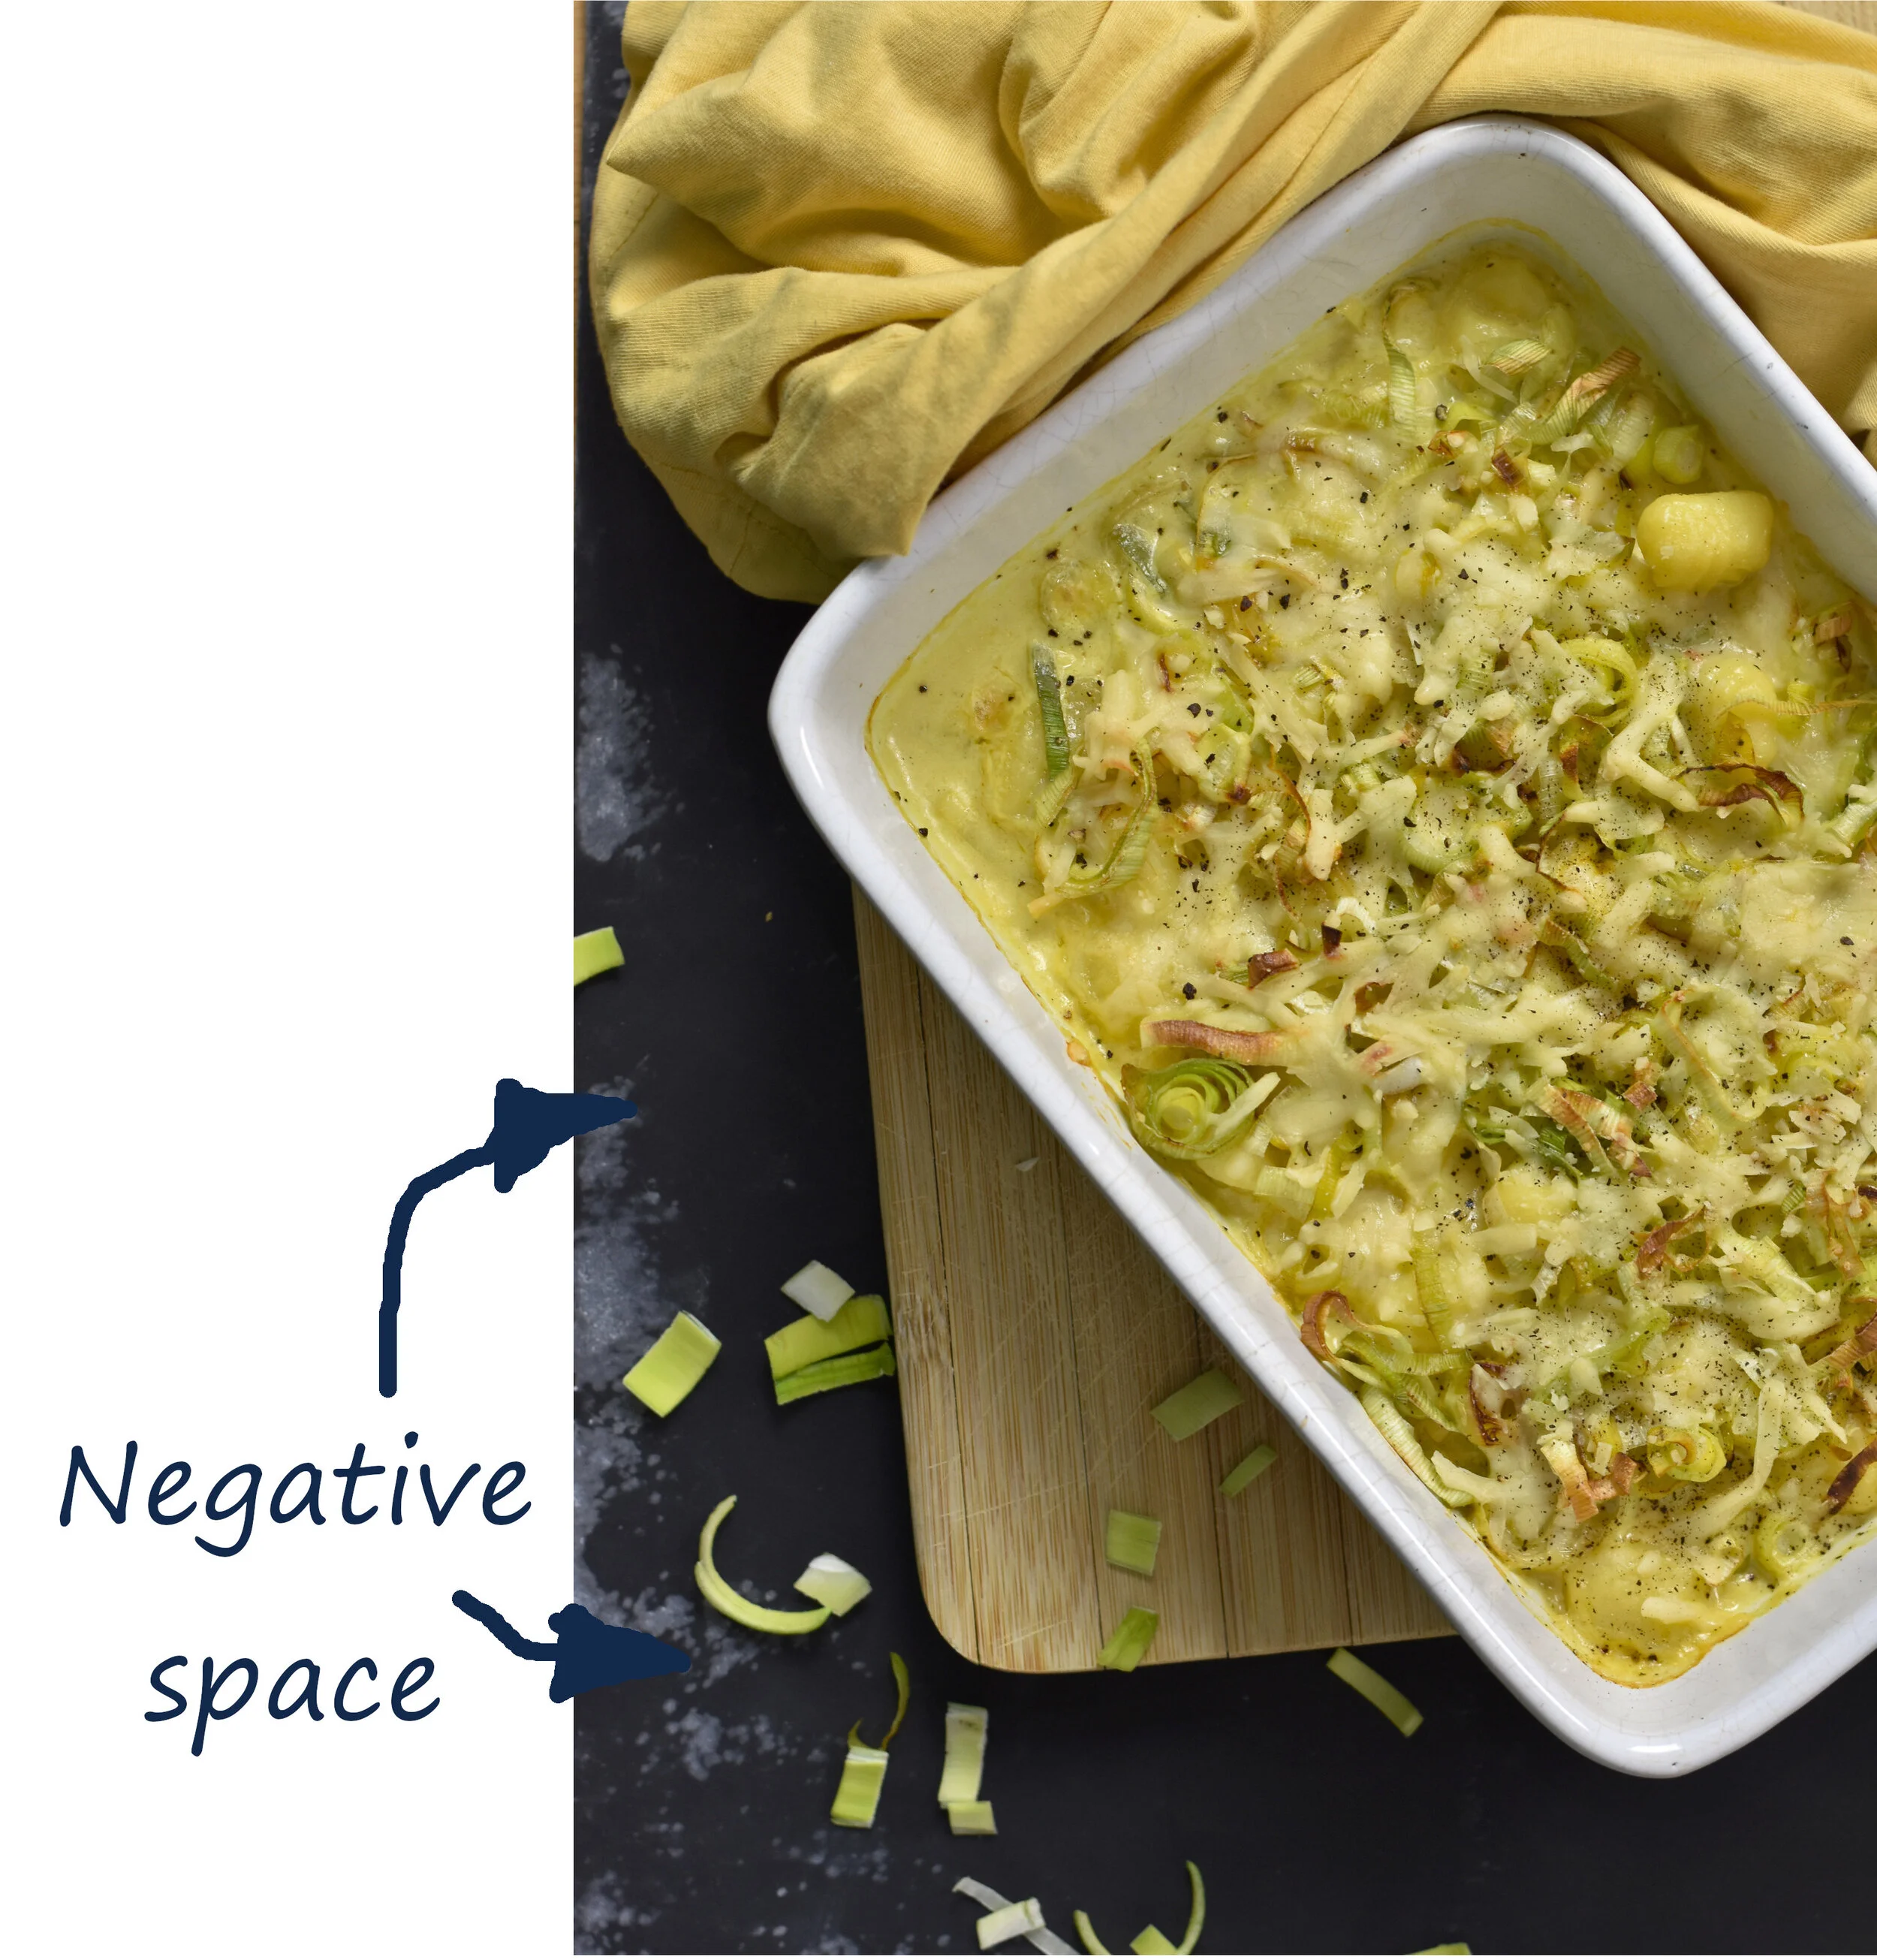
Food photography image - Showing negative space
Backdrop
My “Photography backdrop” in this food shot is a piece of black foam board I picked up from an arts and crafts shop for £3.5. On its own, it looks a bit, well, dark. That solid colour sure creates contrast but there are no interesting textual points. So I've smudged chalky white paint across it to add that texture.

Foam board backdrop with chalk for texture. Chalk highlighted.
I’m sure you’ll agree that looks a lot better than laminate flooring? I sure think so.
Food Photography Lighting
The lighting is one of the most important parts of taking this photo and at the same time one of the most frustrating things to get right.
I have two artificial light sources in this image. The first, of to the back end of my set up, closest to the food is placed above my food at an angle. This creates soft shadows falling across the image. Making the texture in the yellow towel, chopping board and food itself look more pronounced.
The second light source is placed further away and higher. With the first light source, the shadows in my image looked too intense. I could have resolved this issue by adding a reflector on the other side of the frame to bounce light back, diminishing and softening the shadows.
But in the end I decided to add the second light source to do much the same thing.

Not got artificial light?
Not a problem. Setup next to a window to allow natural light to fall over your image. Recreating the same photography lighting I had with two artificial lights. I would have done the same thing if I hadn't taken this photo when it was dark out.
Natural light will also be your best bet for food photography lighting. It's, well, natural. It makes your photo look natural. Recreating that can be difficult.
For more on lighting food photography check out this post i did on some of my top tips for food photography.
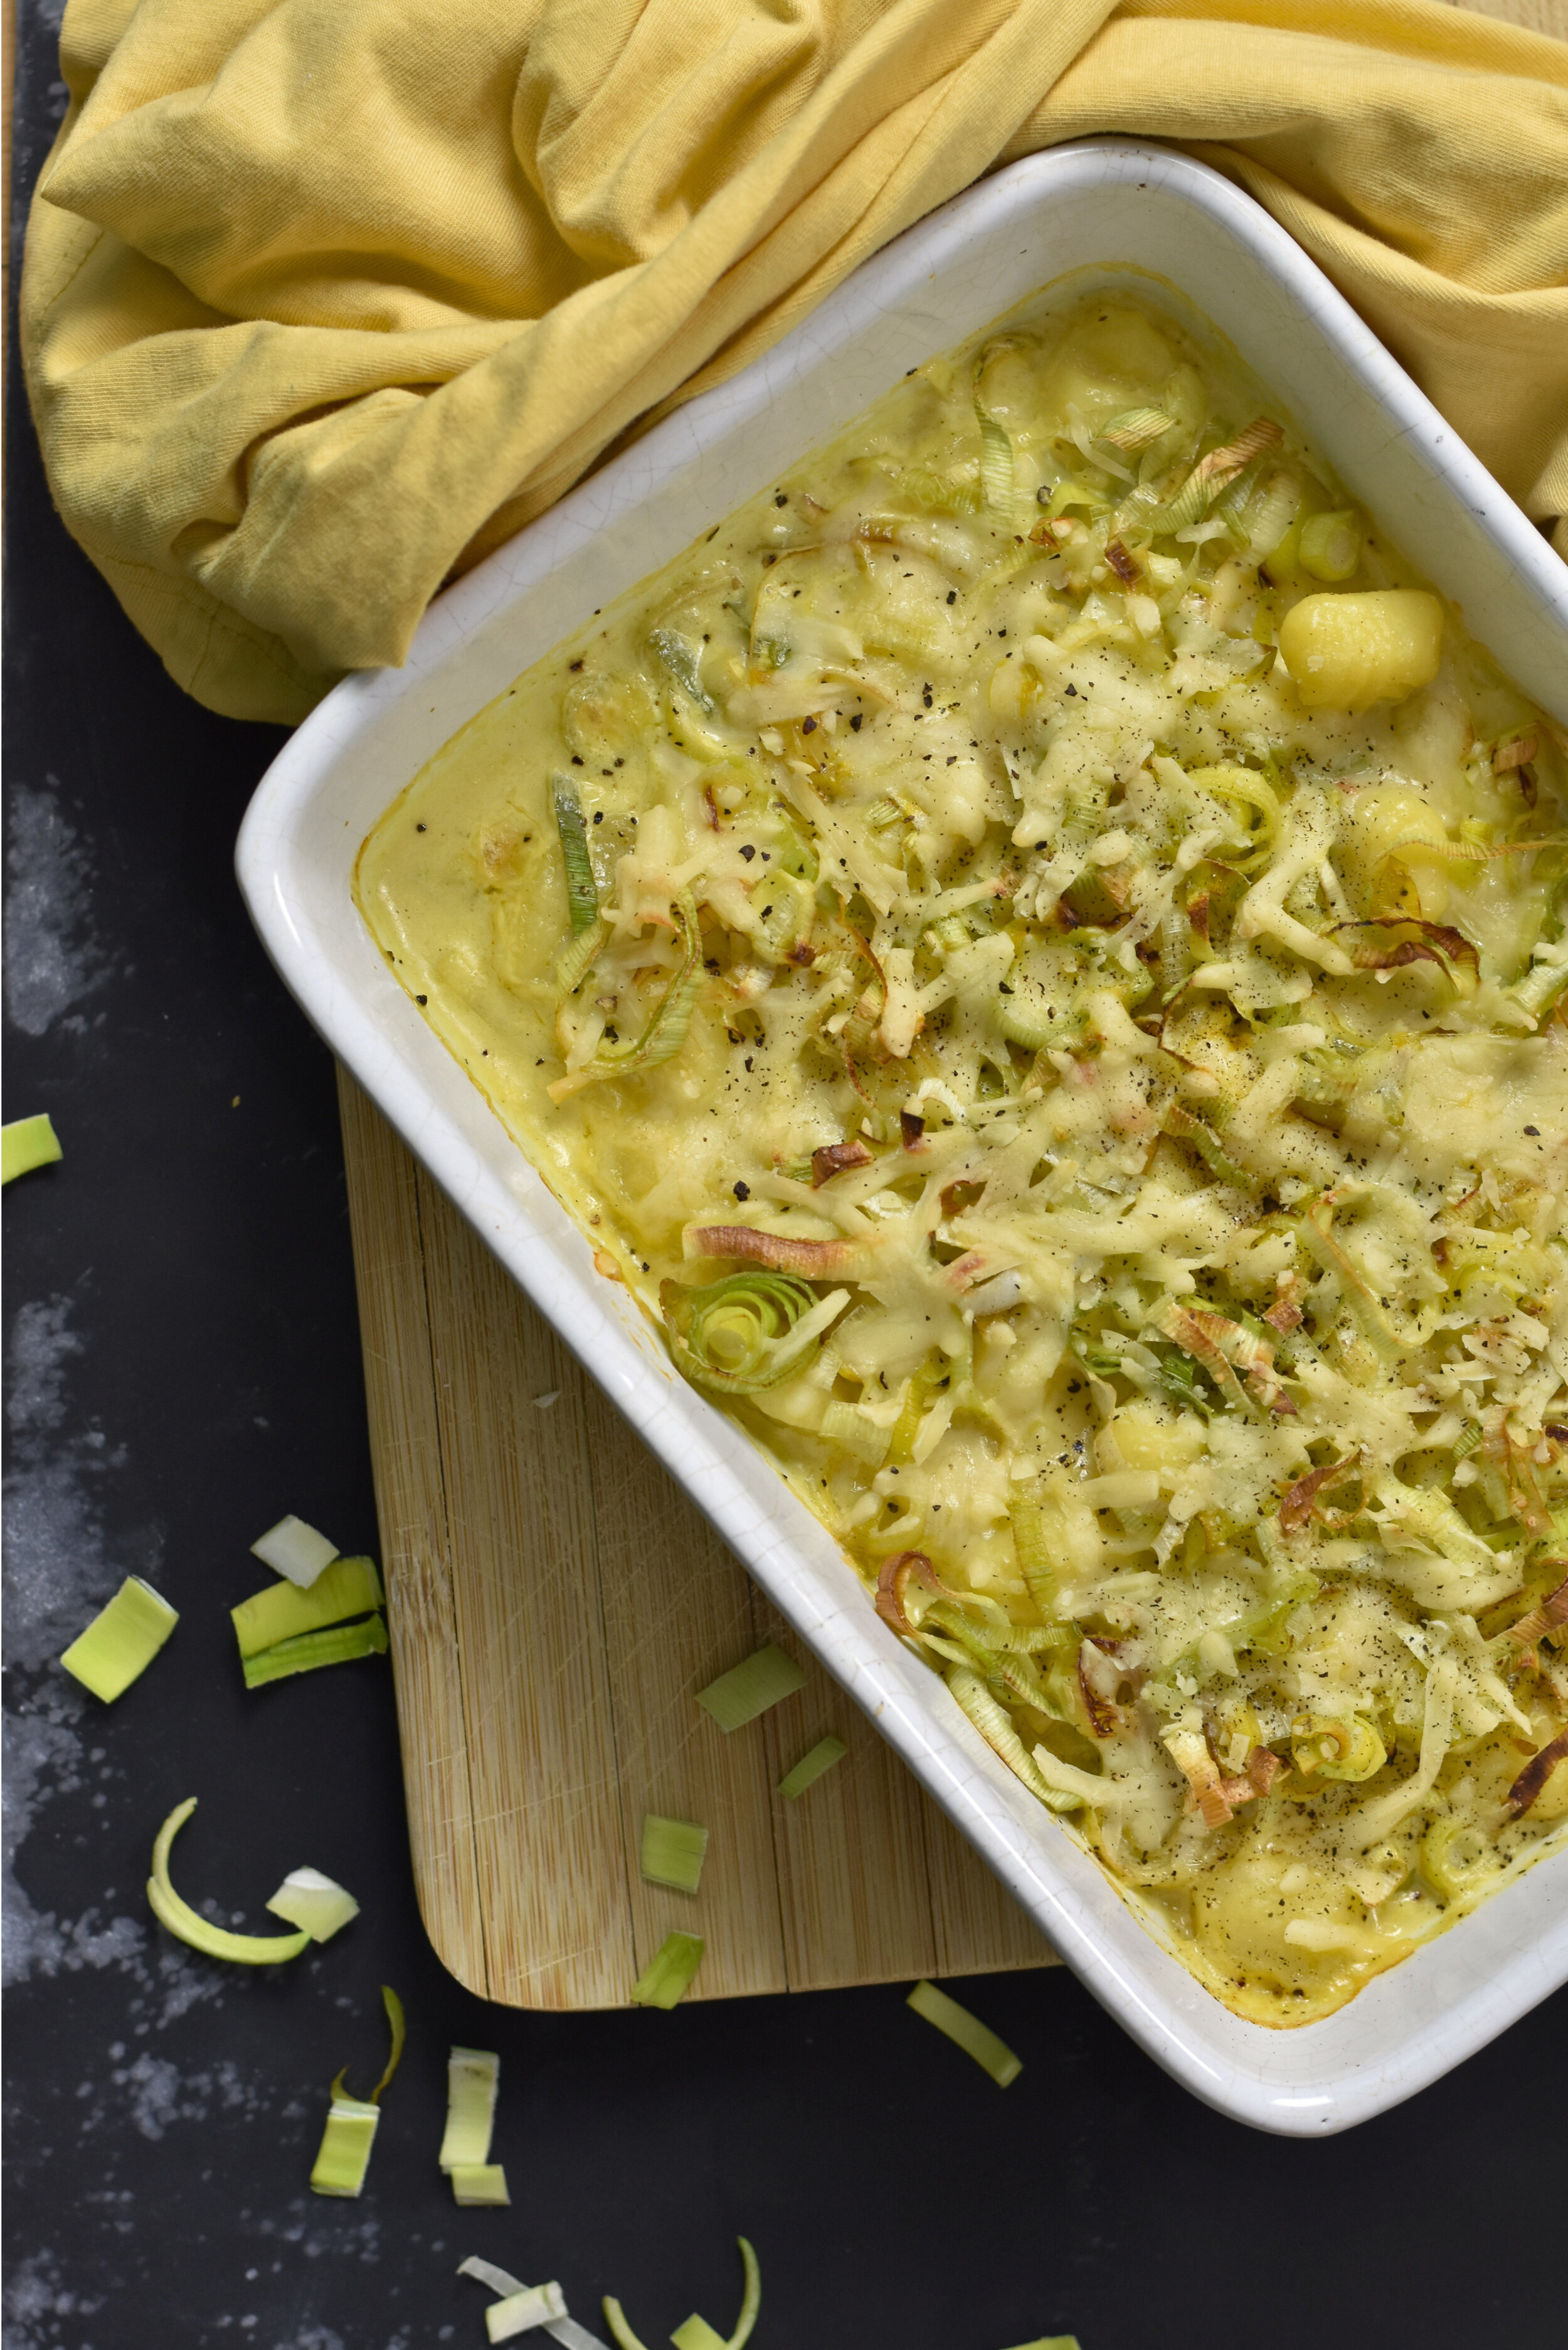
Colour match
Another interesting part of the composition in this image is the colour matching. By using a prop that’s the same colour as my dish adds a somewhat calming sense to the image. It helps build on the story and theme.
In truth, that yellow towel you see in the end photo is actually a yellow T-shirt I had. Just screwed up and placed around the dish.
Colour matching is a favourite compositional food photography tip and technique of mine. I always try to find props that match the colour of a dish to use in my food photography.

Food photography image - Colour match.
Scattered ingredients
Scattered ingredients, yet another compositional technique and food photography tip. Without the scattered leaks around the bottom corner of this dish. It looked to clean, placed and forced. Having them scattered ingredients adds a sense of candidness to the photo.
People tend to respond better to photos that look like they have just been quickly snapped rather than photos that look like someone has styled and set-up. It adds that feeling of realness to the image.

Left - No scattered ingredients | Right - scattered ingredients.
Editing food photography tips
My editing for this photo was a pretty quick process. I don't like spending too much time editing photos because I tend to go overboard. Limiting myself to a “Quick edit” keeps the photo looking as natural as possible.
It’s like what we spoke about above with the scattered ingredients. Food photography that looks to set up has negative connotations. You want your photo to look real, fresh and natural. Not artificial.
Over editing is a sure way to make food photography look artificial.
Step one of editing - Bring out yellows.
Step two of editing - bring down highlights.
Step three of editing - Soften curves.
So what I did to edit this was firstly, I brought up the yellow saturation in the photo. Making them yellows look more yellow, brighter and vibrant.
I then brought down the highlights because the original image looked slightly overexposed. This also gave more of a texture to the image.
Finally I played around with the curves of the image. Softening the overall photo.
Finished image
Finished food photography session photo.
There we have it. The behind the scenes to how I took my photo for my grilled cheesy gnocchi with leeks and mustard recipe. As Well as an insight to how i shoot my food photography, compose my food photography and edit my food photography. A full pasta bake food photography course/food photography tutorial.
I hope you’ve taken some food photography tips from this post. If you have, i would love to know which ones down in the comments below.
If you want to learn more and want more food photography tips, check out some of my other resources below
As always, if you've enjoyed this how-to on food photography, please comment and share, which you can do below. I’d love to know your food photography ideas and tips.
If you have any questions feel free to drop them in the below comment section and i will get back to you the best i can ASAP.
Have fun getting creative with your photographing food!