
9 Chocolate Garnishes for Cake and Cocktail Decorations
9 Ideas for unique and easy chocolate garnishes perfect for decorating cakes and garnishing cocktails.

Chocolate. Who doesn’t love chocolate? And such a popular ingredient for food and drinks. Especially when it comes to cakes and cocktails.
Lets talk cakes
Big cakes, birthday cakes, wedding cakes, cupcakes. They all benefit from a little bit of chocolate. We see plenty of these amazing chocolate decorations that just take the most basic of cakes to a whole new level.
Even when cakes don’t feature chocolate we still see chocolate decorations. Why is that? It’s because its completely edible and can be melted, bent and designed into beautiful decorations.
Lets talk cocktails.
Chocolate can be used both to garnish a chocolate cocktail, and to contrast a non chocolate cocktail. It gives a bit of sweetness to a dry or bitter cocktail and makes a sweet cocktail that much more indulgent!
Once again, they are completely edible and can be made into stunning garnishes.
The thing is, a lot of these stunning looking chocolate cocktail garnishes and cake decorations are really easy to make. Below I’ve mentioned 9 unique chocolate decorations that look stunning, can be used to garnish a wide range of cakes a cocktails and most importantly are easy to make at home.
Sure, some might be a little bit more fiddly then others but you don’t need any prior experience or weird equipment to make them. Most just call for baking paper and chocolate and you’re good to go.
The basics


First things first. Before we jump into this they all have one basic thing in common. Which is the use of melted chocolate. So before you begin, pick up some baking chocolate and non stick parchment paper to get creative with.
If there's one in particular you want to make then still have a look through them all. They are similar in technique so once you have the stuff to make one, you will more than likely be able to make most of them.
And don’t forget to have fun! Don’t stress out over melted chocolate, it aint worth it.
Makeshift piping bag
A lot of this involves piping chocolate. You can do so with a piping bag however I find it easier and a lot more convenient if you make your own with the baking paper.
To do this simply cut a square out of your parchment paper and roll it into a cone shape. Pour the melted chocolate into the cone and cut a small bit from the point and viola! Easy chocolate piping.
You don’t even have to secure the cone to keep the chocolate in place. Just holding it does this for you.
Chocolate decoration and garnishes video
Break down of the video
#1 Chocolate lollies
Simple yet delicious. First on the list is chocolate lollies. All you need for this is some melted dark chocolate and skewers.
To make these, place the skewers on some non-stick baking paper and start piping your chocolate like in the video.
Start by first piping a big dollop on the top of the stick to make sure once your chocolate dries it stays in place. Then you can do a larger circle around that dollop and finally fill in the circle with whatever design you want. As you can see from the above video I swirled it in somewhat of a flower/wheel shape. This works perfectly because it gives enough structure to the lollies so they stay firmly in place.
You also want to make sure you pour enough chocolate around the skewer itself. The last thing you want is top heavy lollies that fall off your skewers as soon as you pick them up.
Adding extra touches.
For a little bit extra finesse, these lollies make the perfect base to sprinkle over some extra tasty bits. You can add whatever you want. Pistachios and granola work great! I added desiccated coconut to one which would be used in a chocolate and coconut cocktail, and for the other I added sprinkles for a decorative touch to my cupcake.
Keep your lollies in the fridge for at least 1 hour so they have time to cool down and harden.
#2 Chocolate drawings
This is one of the most fun to do. All you need is your melted chocolate, baking paper and a little bit of creativity. First make a piping cone/bag out of your baking paper as explained above.
Next grab yourself a piece of paper and draw and design what you want to turn into chocolate. The beauty of baking paper is that it's quite transparent so you can lay your baking paper over your drawing and use it to trace out your drawing in chocolate.
You could do anything. Love hearts, music notes and little squiggly patterns is what I did but you could do just about anything. Just keep in mind that for it to come off in one chocolate piece, all the lines have to be touching in one way or another. Think about how the chocolate will connect.
Keep you lollies in the fridge for at least 1 hour so they have time to cool down and harden.
#3 Chocolate honeycomb/gears

Such a simple idea that works perfectly. Grab yourself some bubble wrap (yes bubble wrap) then pour melted chocolate all over the top. Use a palette knife to spread the chocolate out into an even layer.
Pop your chocolate smothered bubble wrap into the freezer so it has time to harden.
Once hardened, flip your chocolate bubble wrap over so the chocolate part is facing down and slowly peel away the bubble wrap.
After which you can use a skewer to pop out the holes to make more of a geometric design, break it into rough chunks or as I did - use edible cake spray to spray your chocolate gold for more of a industrial gears look.

#4 Chocolate covered glass
Super simple but looks beautiful. Drizzle or pipe chocolate on the inside of a glass and pop in the fridge to harden. This works best when whatever drink you’re having is lightly coloured to add some contrast in colour.
The beauty of this is that not only does it look fantastic, but the chocolate will slightly melt into your drink which tastes wonderful!

#5 Chocolate Butterfly
This is much like what we covered in number 2 with the chocolate drawings. However they look so beautiful they deserved a section on their own.
Start off as you would with number 2. Draw a butterfly and place over some baking paper, then use chocolate to pipe over your butterfly design.
Next to give our chocolatey butterfly some life, open a book and place your chocolate butterfly in the middle. Use tins, glasses or anything you can get your hands on to prop up each side of the book and leave your butterfly to harden.
Once hardened and because each side has been propped up, the wings on your butterfly will be pointing upwards.
#6 Chocolate Cherries/Strawberries
Strawberries and cherries are both classic garnishes for both cakes and cocktails. But they also have something else in common which is that they pair beautifully with chocolate.
So to take your cherries and strawberries to the next level you want to melt a bowl of both dark chocolate and white chocolate. First dip your strawberries and cherries in the dark chocolate then pipe or use a spoon to drizzle the white chocolate over in a criss cross motion.
Leave them in the fridge to harden then use to garnish cakes and cocktails. If you want to stick the cherry on the base of a coupe like I did in the video/below photo, then use a lighter to melt the chocolate on the bottom of the cherry. Once melted hold it on the base of your glass and it will harden keeping your cherry in place.

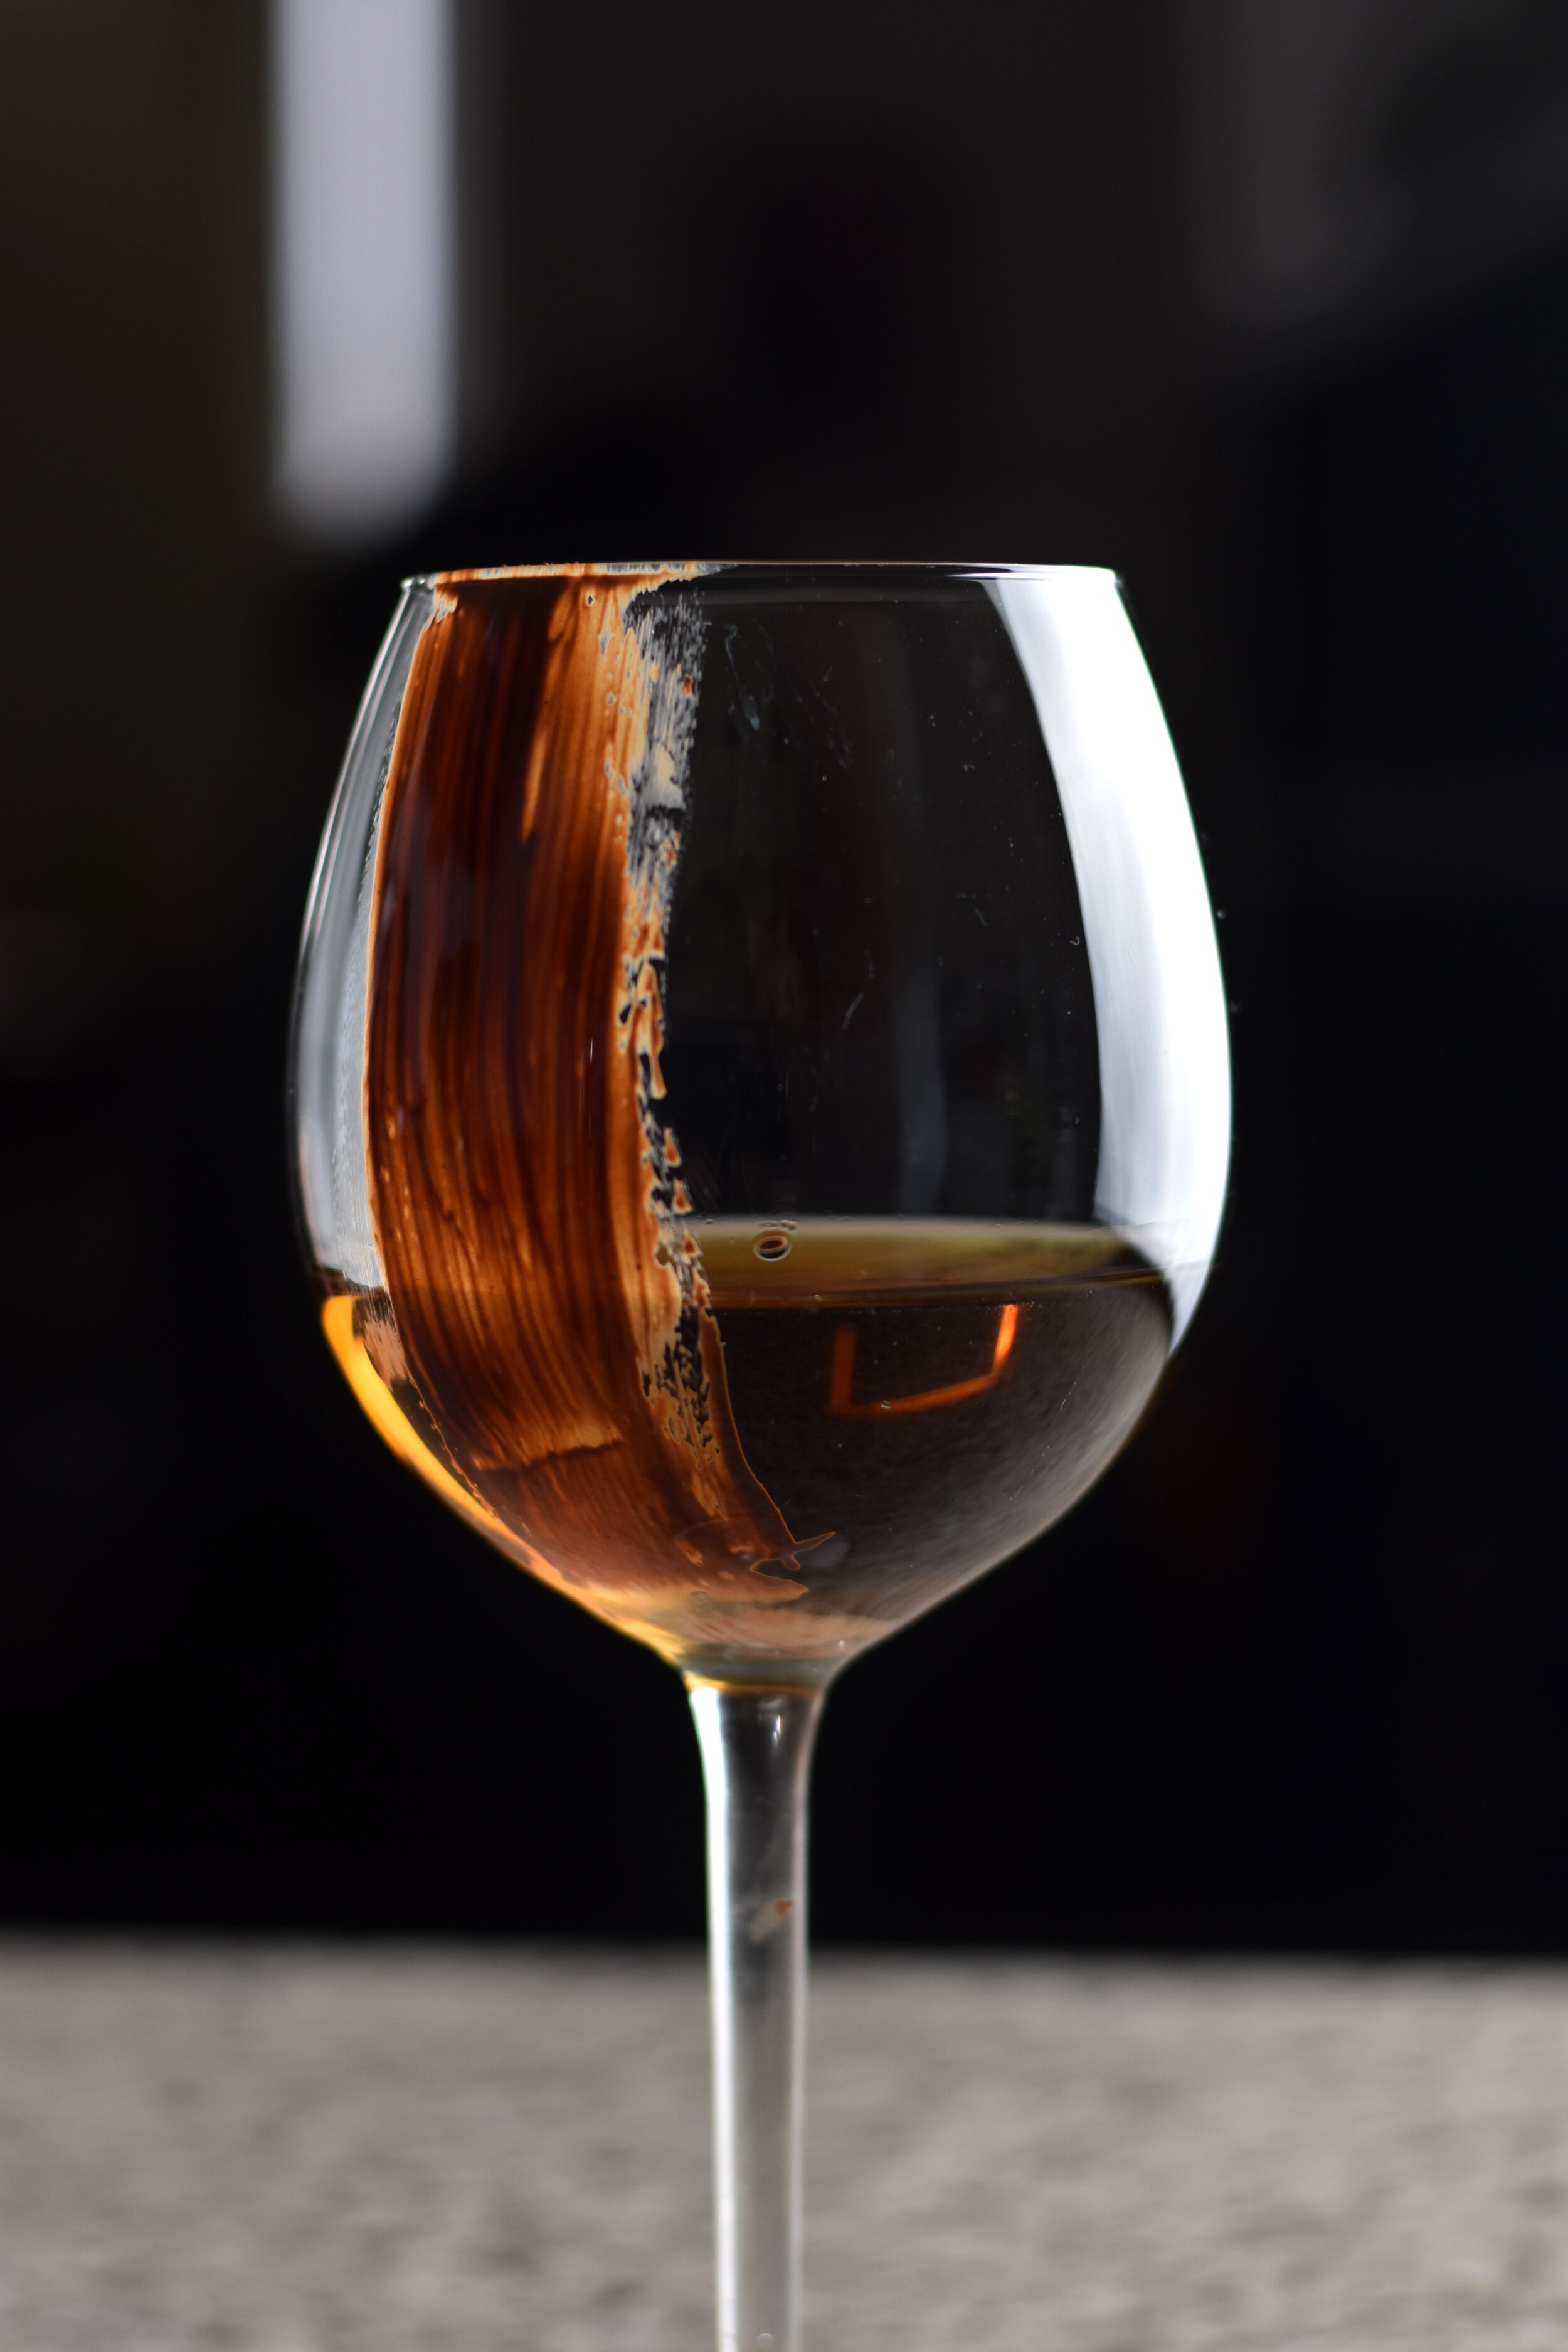
#7 Chocolate Paint
Edible paint is something that is gaining more popularity in cocktail garnishing of recent. Chocolate is one of the easiest ways to do this not to mention one of the most delicious.
To do this melt a bowl of either dark or white chocolate. Use whichever will contrast with your drink the most. If you’re making a dark drink use white, lighter drinks use dark. Then use a brush to brush a single line on the inside of your glass.
You could also do one with the dark chocolate then one with the white on the same glass to give an interesting painted look. Or use white chocolate and dye it whichever colour you want!
#8 Chocolate Straws/bark
Lay out a small piece of baking paper and cover it completely with chocolate. If you use both dark and white and spread them together you will get a lovely marble look which works great.
Roll up your baking paper and stick it in the freezer to harden. Once you unwrap it you should have a solid chocolate straw.
For the look of bark use a longer piece of baking paper and when you unroll it roughly break it apart so it has the look of bark. For a perfect straw you can drink out of you will need to spread the chocolate thicker and roll it tighter. This might take a bit of trial and error to get right.

#9 Chocolate spirals
Lastly is these chocolate spirals. These are a favourite of mine, I just love the way they look. To make these, dollop some white chocolate onto baking paper then use the back of a spoon to even it out into a circle.
Pipe around a spiral with dark chocolate then grab yourself a cocktail stick or skewer. Point your cocktail stick in the centre and drag it outwards. Repeat this all the way around to get this spiky spirally pattern. Once they harden you can use them to garnish both cocktails and cakes.
You can even do a lot of them and use them to surround a full cake for a trippy spiky pattern look which looks amazing.
